Guide
The images on this page were captured at a point in time. App updates may have changed the layout or wording since.
The basics
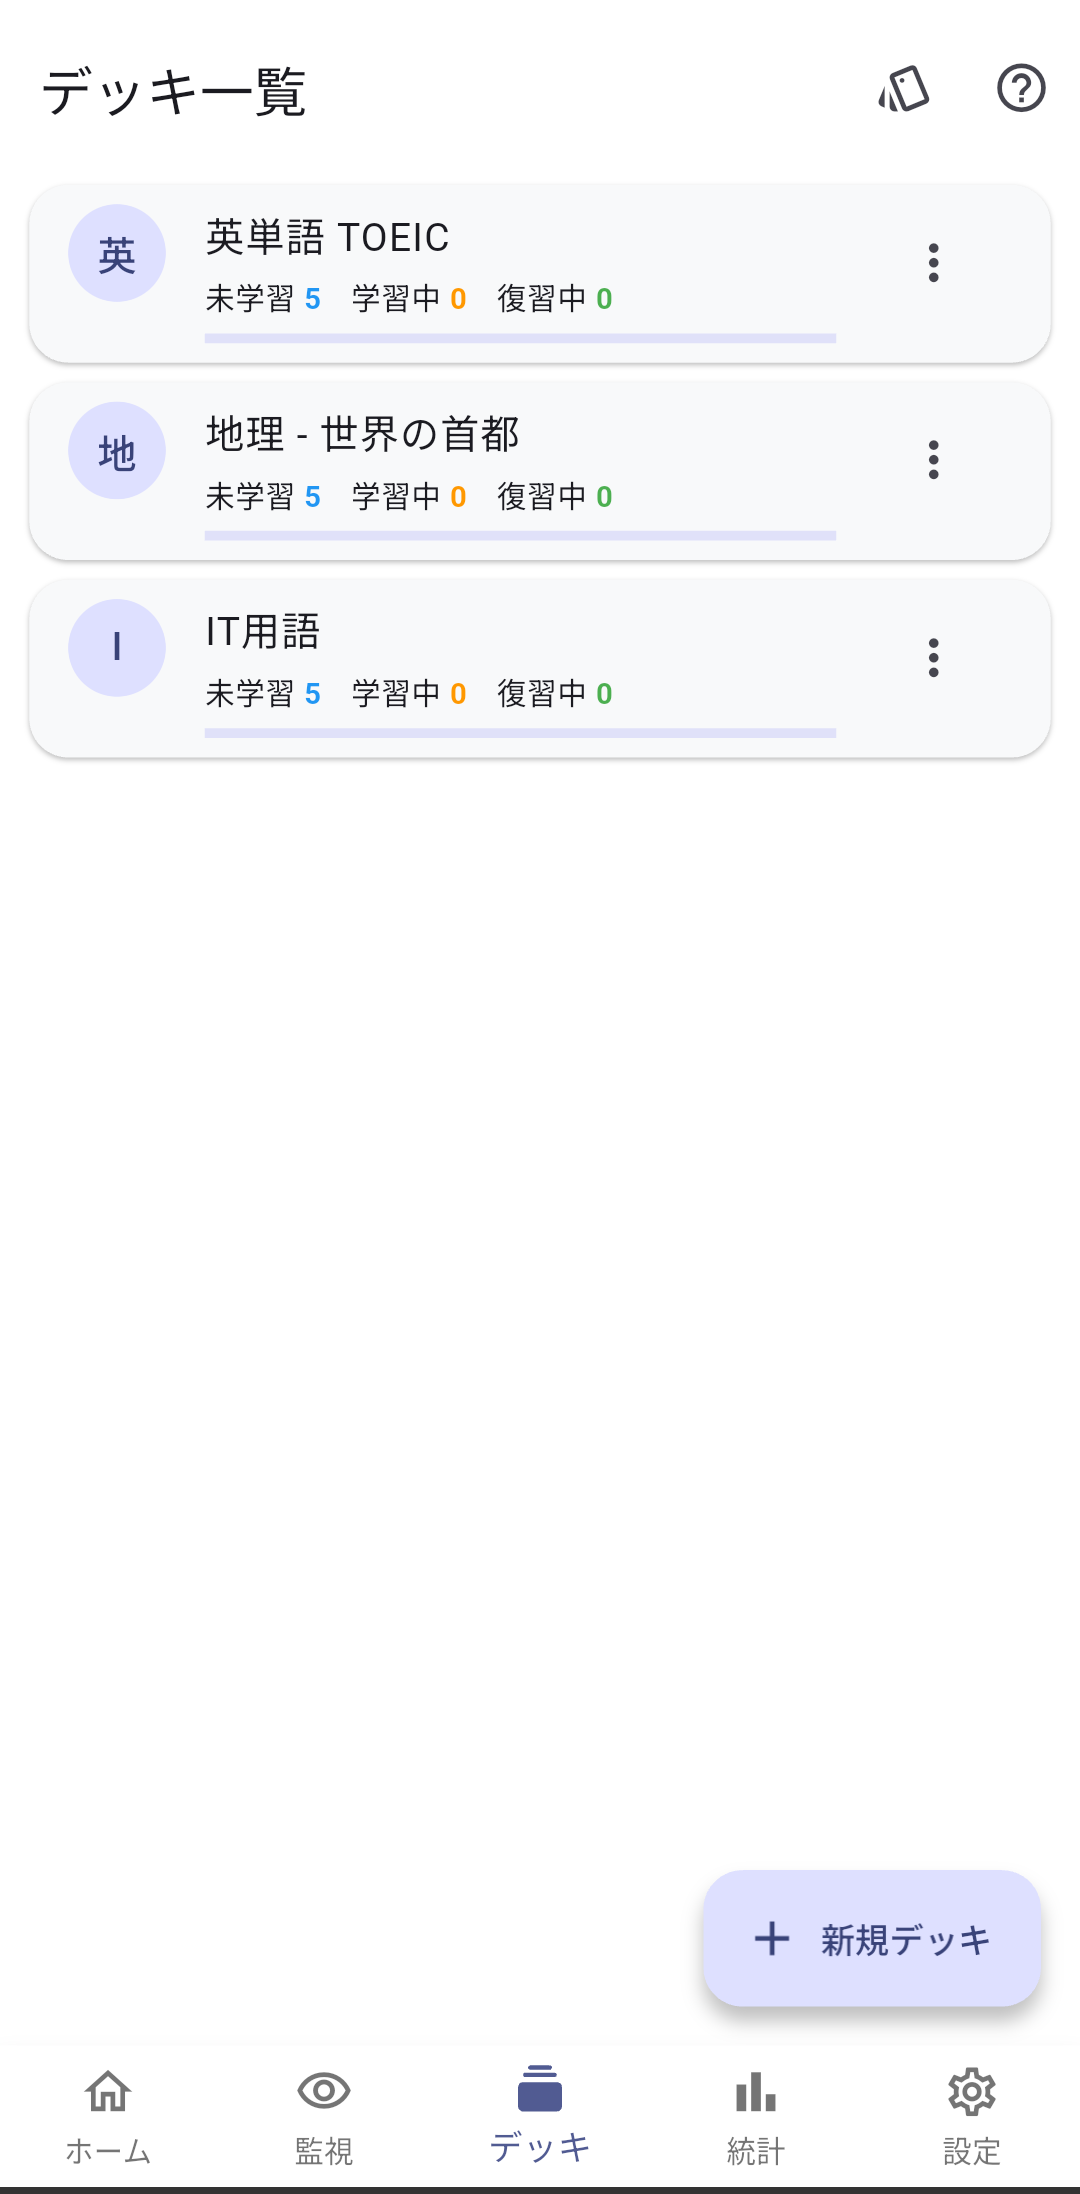
1. Create a deck
Open the Decks tab and tap "New deck". Splitting decks by topic — vocab, exams, work terms — keeps things easy to manage.
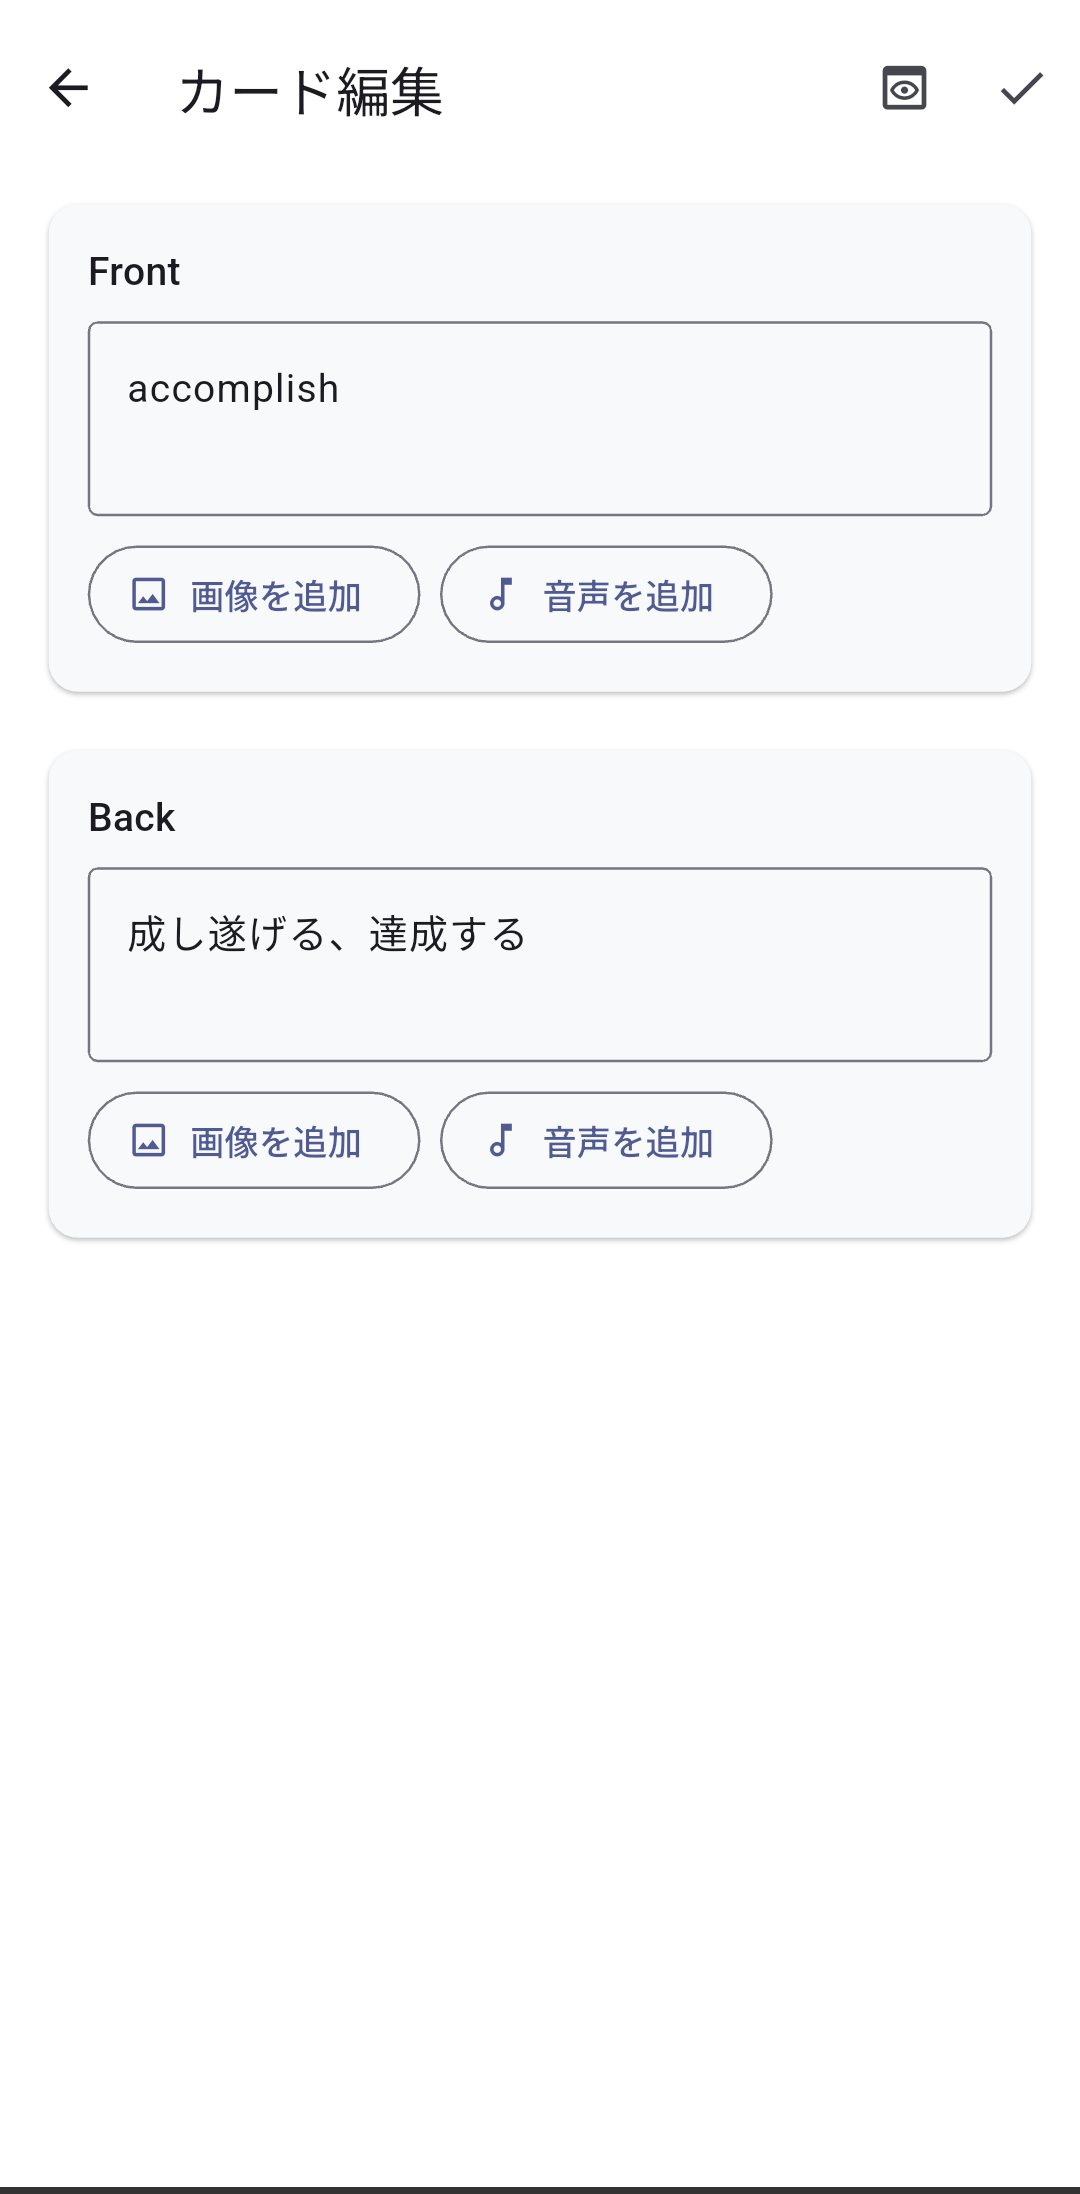
2. Add cards
Open a deck, tap Edit then + for a new card. Add front and back text plus images or audio. You can also bulk import from txt or csv.
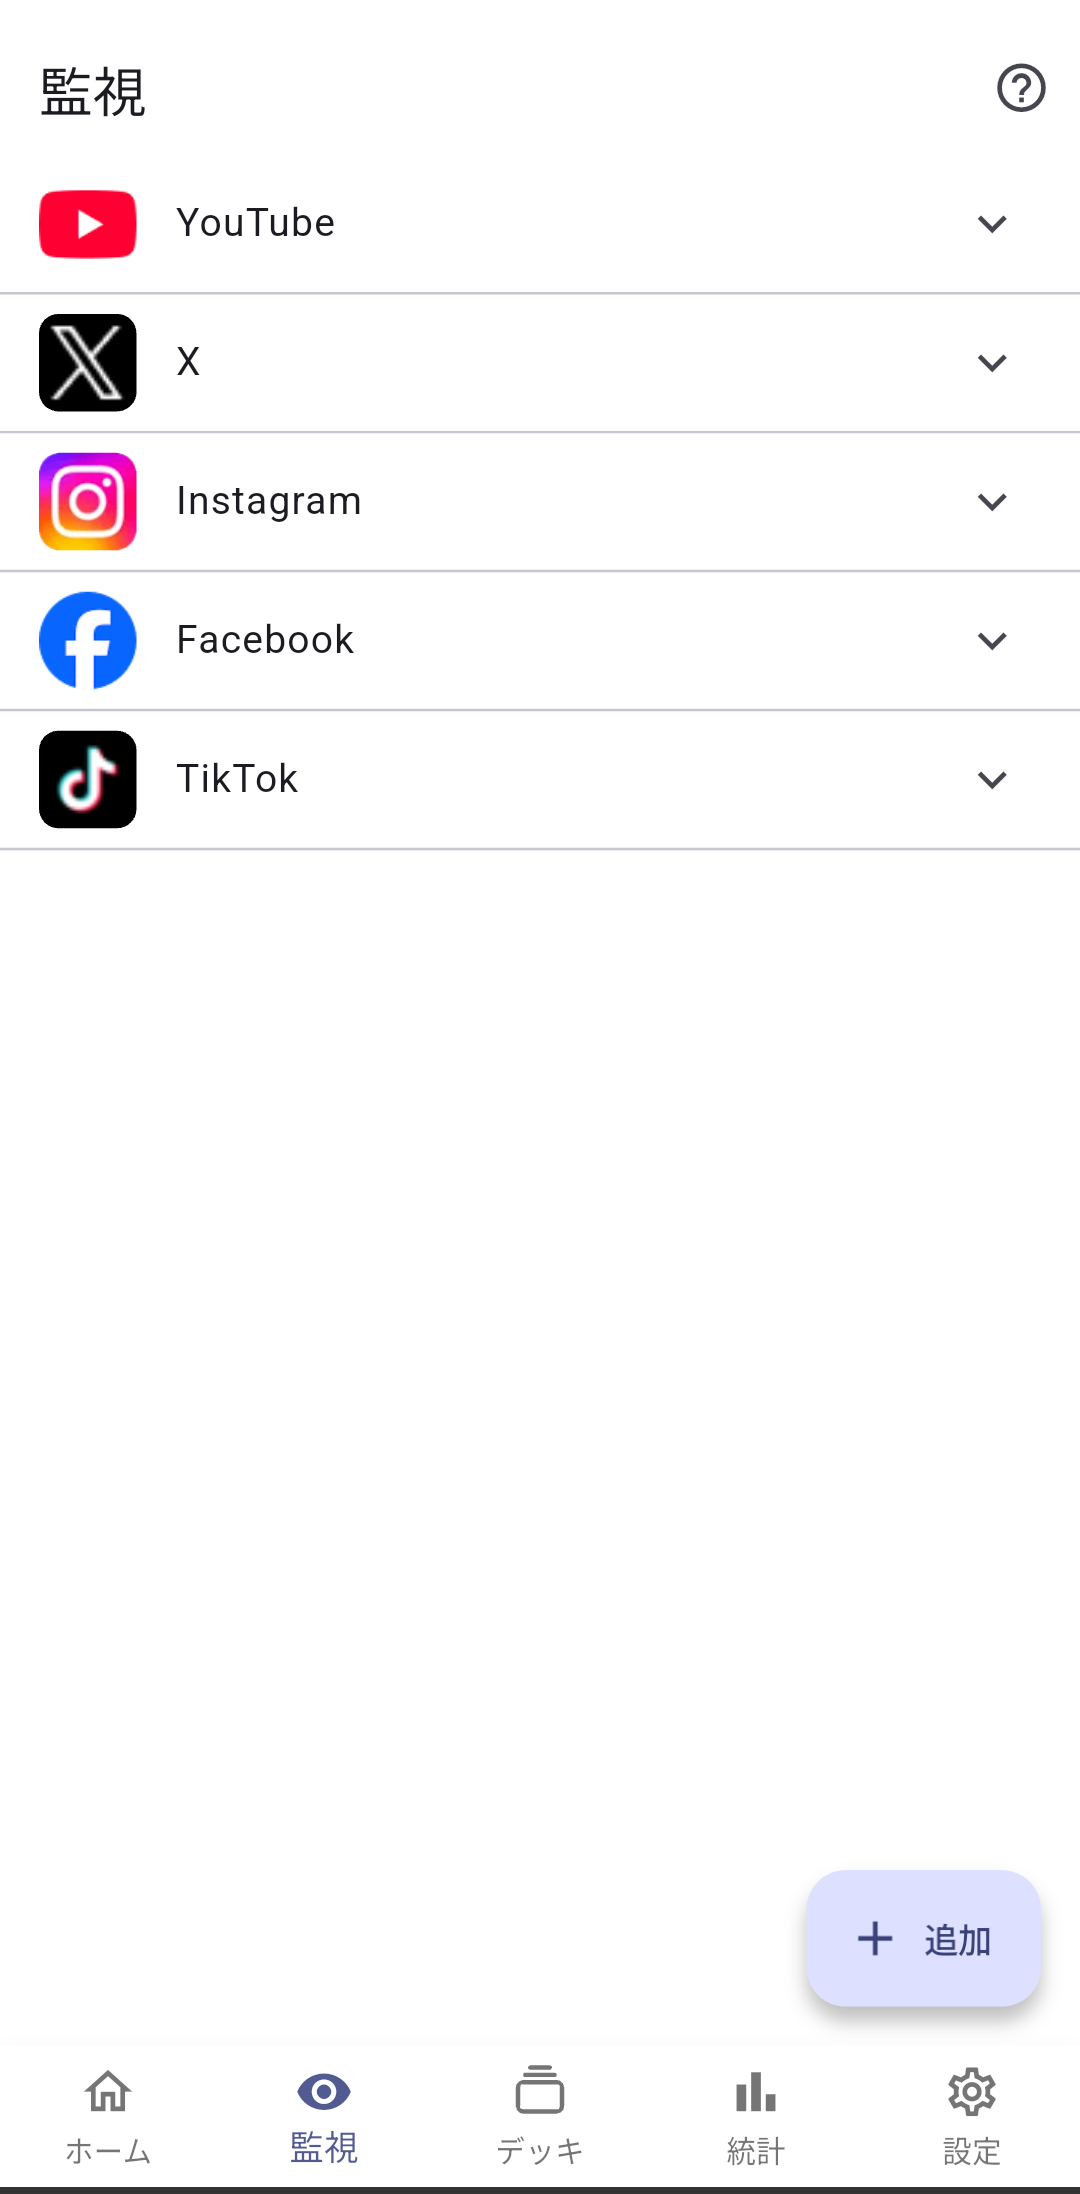
3. Pick what to monitor
From the Monitoring tab, choose the apps that should trigger Pop Quiz. Apps and their site URLs are grouped together, so you add them in one go.
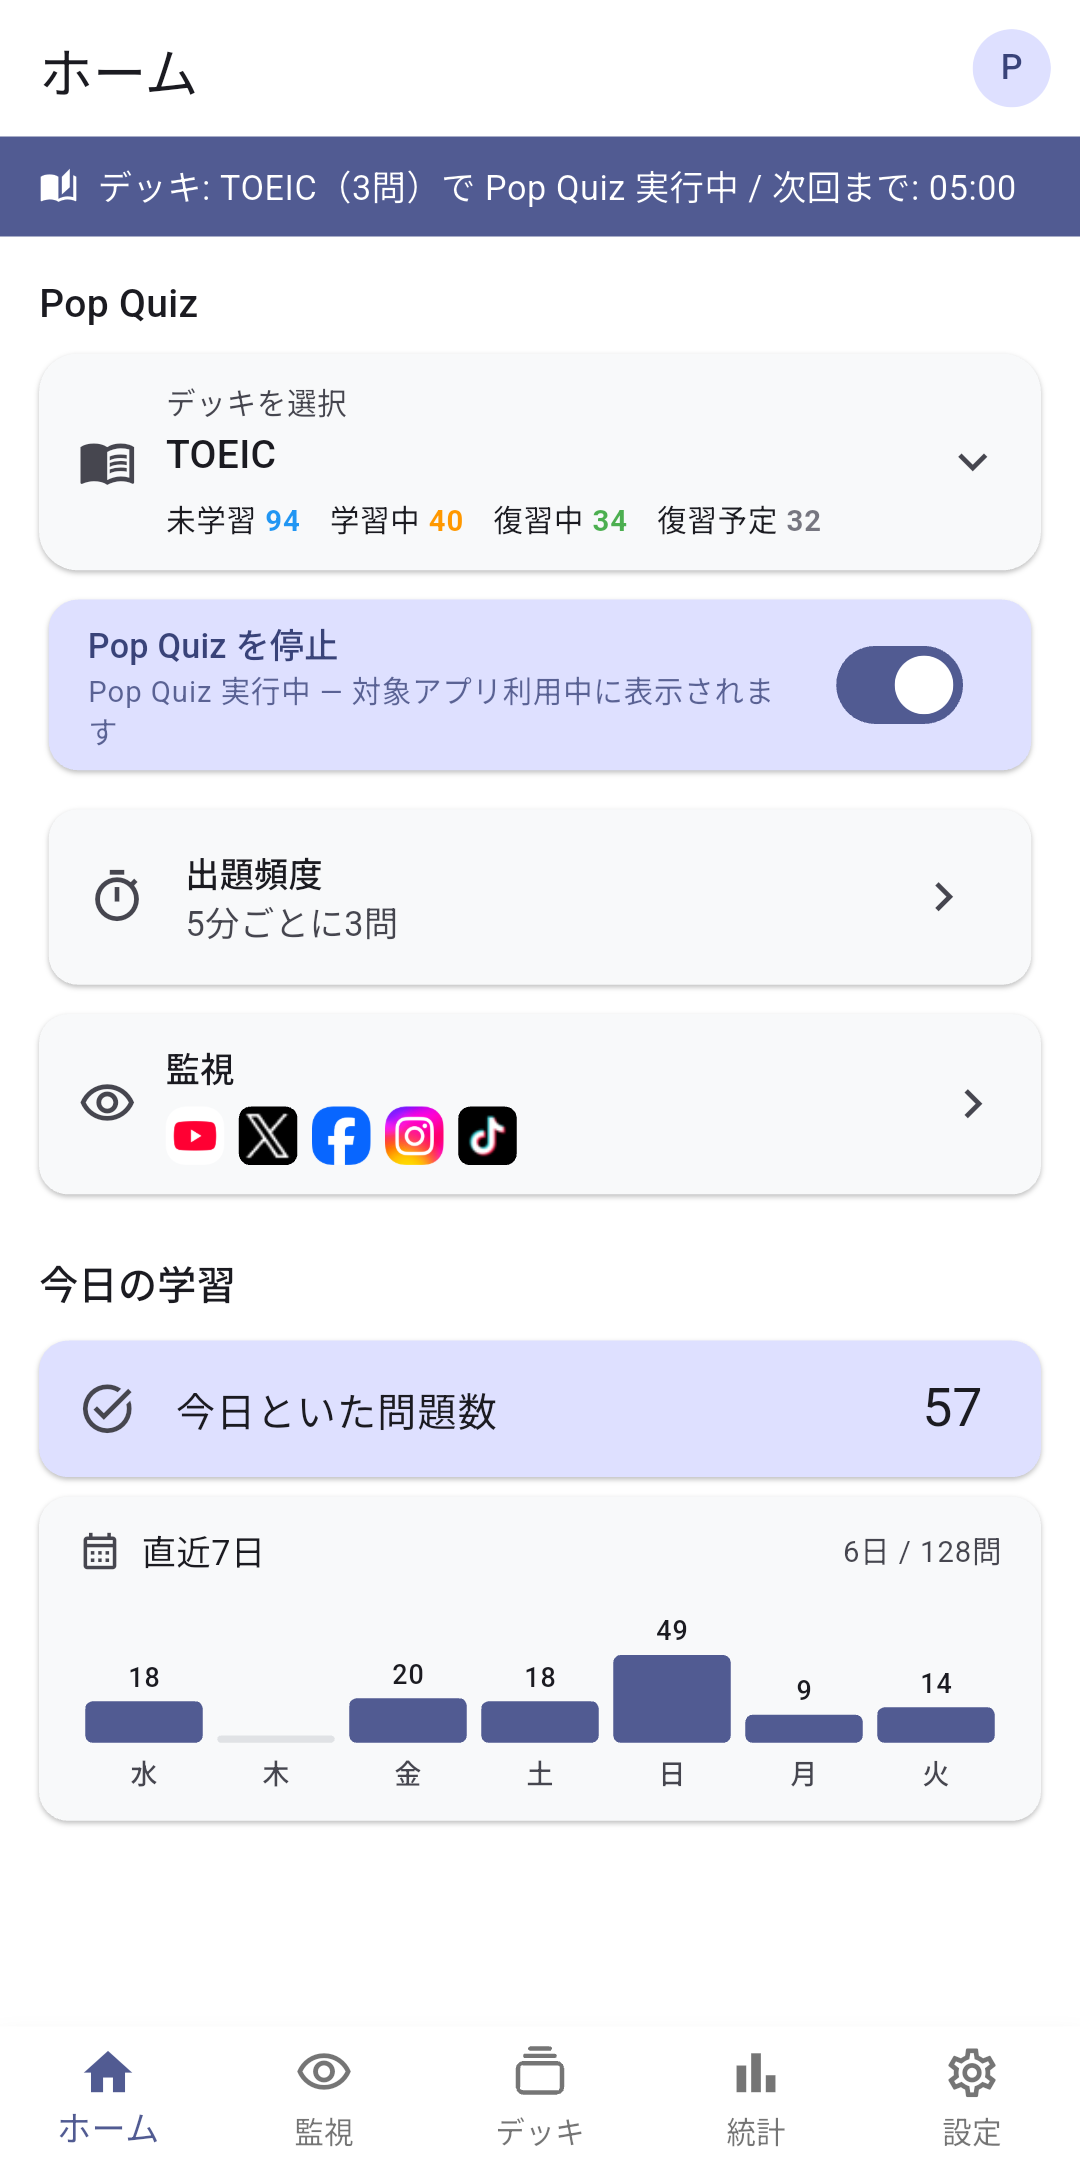
4. Turn Pop Quiz on
Pick a deck on the home screen and flip the toggle on.
5. Use your phone
Time spent in the apps you chose adds up in the background.
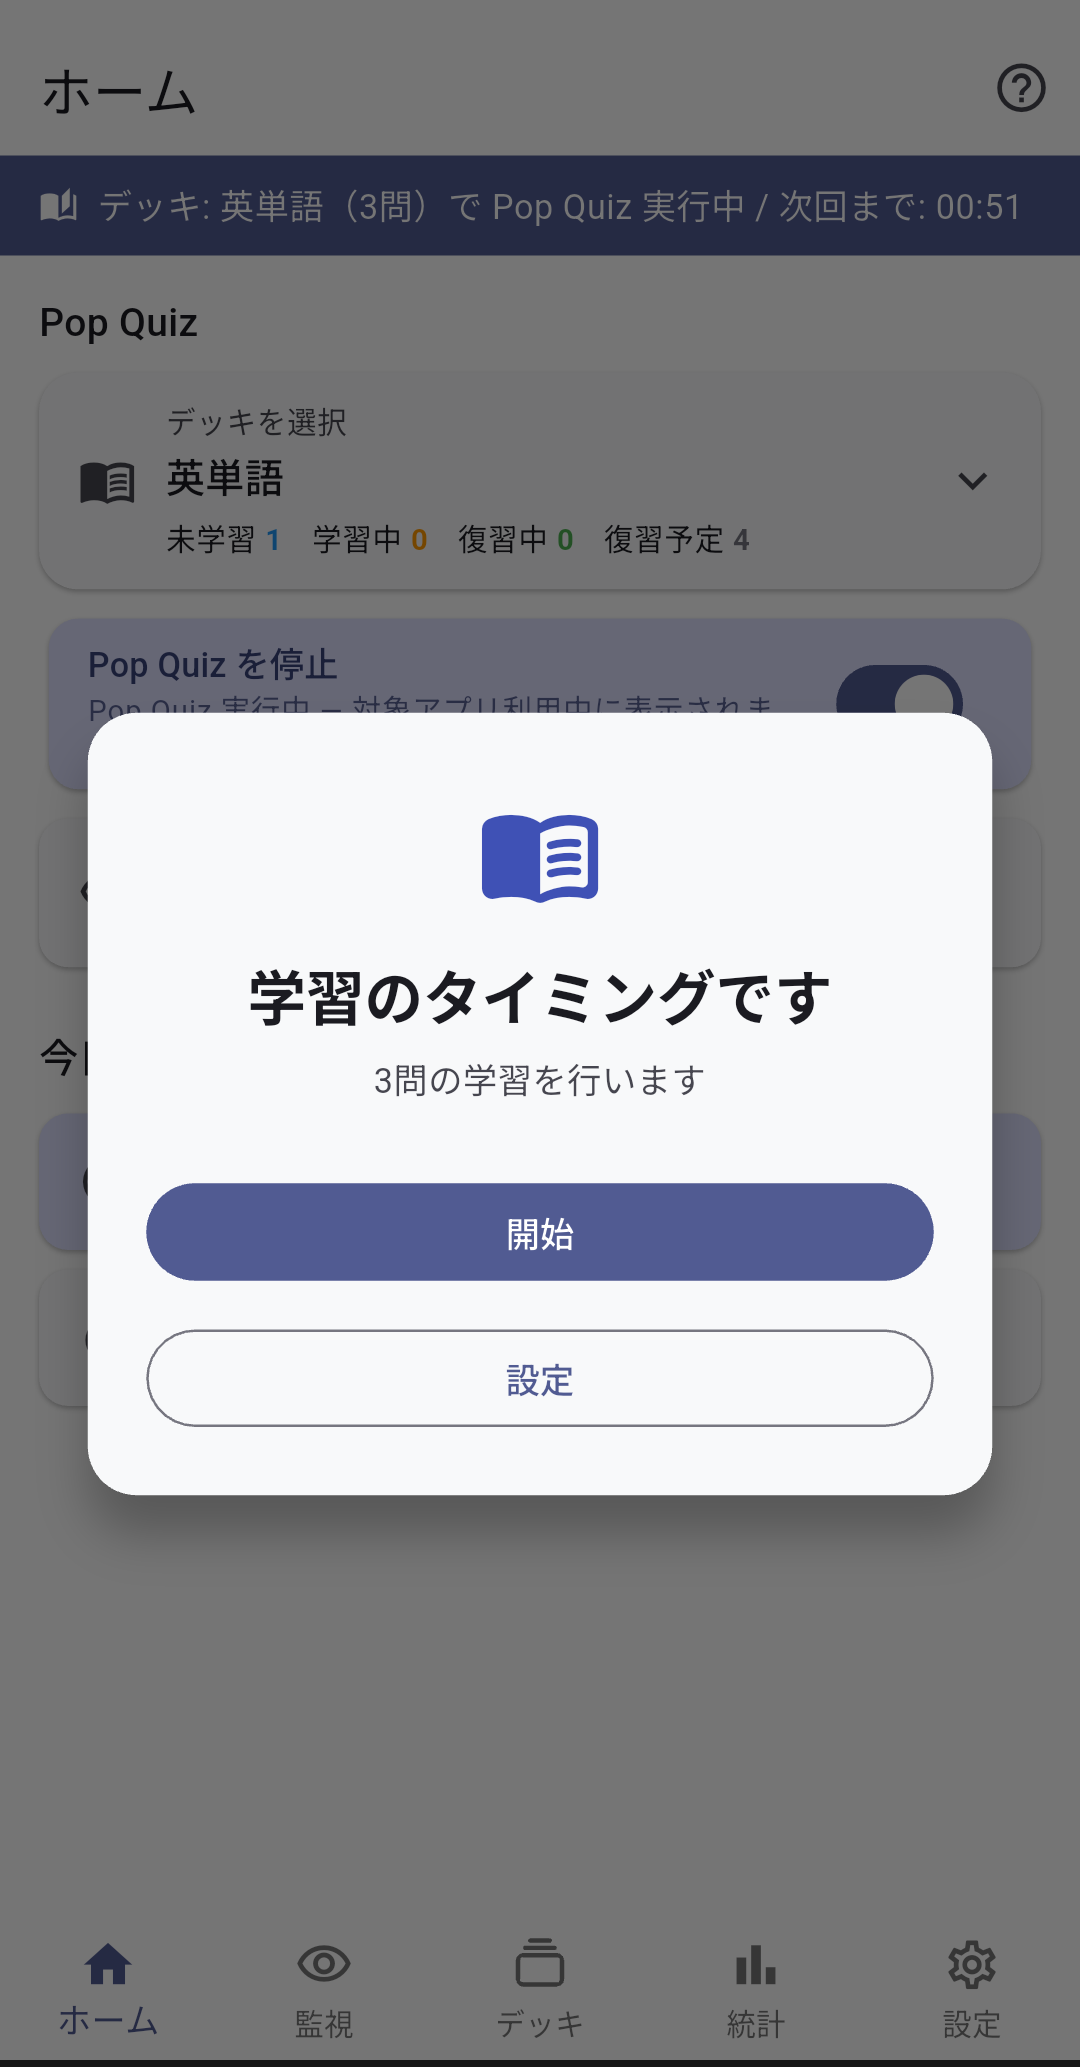
6. Enough time in the app, and a card appears
Answer it and you go straight back to what you were doing.
Card types
A card type holds the set of fields and how the front and back look. Each deck uses one.
What a field is
A field is one of the inputs you see in the card editor. You start with two, Front and Back, but you can change how many there are and what they are called.
Fields belong to the card type. Every card in a deck has the same ones, so you cannot give a single card an extra field.
Example: a vocabulary card
Say you make three fields — Word, Meaning, Example. The card editor then shows three inputs, which you might fill in like this.
| Word | accomplish |
|---|---|
| Meaning | to succeed in doing something |
| Example | She accomplished her goal. |
Next you decide how the front and back look. Writing a field name as {{Word}} replaces that part with each card's content.
For a front that shows only the word:
<div class="word">{{Word}}</div>The back keeps the question visible and adds the answer:
<div class="word">{{Word}}</div>
<hr>
<div class="meaning">{{Meaning}}</div>
<div class="example">{{Example}}</div>
Then style those class names in the CSS box:
.word { font-size: 32px; font-weight: bold; text-align: center; }
.meaning { font-size: 20px; text-align: center; }
.example { font-size: 15px; color: #8A94A6; }
That gives you the word large and centred, the meaning below it, and the example small and grey. Which fields go on the front and which on the back is up to you — repeating a front field on the back keeps the question in view while you check the answer.
A preview in the editor shows your changes as you make them.
Importing txt / csv
Turn a word list you already have into cards in one go.
File format
- Extension: txt or csv
- UTF-8
- One line is one card
- Each column, split by the delimiter, fills the card type's fields in order
The delimiter can be tab, comma, semicolon, or pipe. It's detected when the file loads, and you can change it afterwards.
Tab-separated, with the usual two fields:
apple	a fruit
orange	another fruit
grape	grows in bunches
If the file has a header row, delete the first card after importing.
How to import
- From the + in the Decks tab, choose Import from file
- Pick the file
- Set the deck name and card type
- Check in the preview that columns line up with fields
- Run the import
If the number of columns doesn't match the number of fields, the preview warns you. You can edit the card type right there.
To use images or audio, press "Add images, audio or a ZIP" on step 3 above and pick every file you need. A ZIP is fine — its contents are taken out.
Then write [img:filename], [audio:filename] or [video:filename] in the cell. Files whose names match are put into the card.
Exporting and importing decks
A deck can be packed into a single .poppin file, including your progress and any media.
Exporting
Choose Export from the menu to the right of a deck in the list, or from the menu at the top right once the deck is open.
Importing
From the + in the Decks tab, pick a .poppin file.
Progress is restored along with the cards, and any card type it uses is added to your list. If you already have one with the same name, you're asked to rename it.
If a deck with the same name exists, a number is added to the end.
The contents may differ from the current version.